If you’re seeking a dairy-free alternative to traditional yogurt that still has a creamy and delectable texture, homemade coconut yogurt is your best bet. It’s easy to make this delicious yogurt alternative at home, and it’s packed with nutritious ingredients and bursting with the flavors of the tropics.
Yogurt was one of my biggest struggles after becoming vegan. I remember my first reaction after seeing the prices for plant-based yogurts. I mean, what is the hack? In UAE, fresh coconut is AED3, 1-liter coconut milk is AED12-16, and 200-gram coconut yogurt is AED22.
Eventually, I found myself searching for homemade plant-based yogurt recipes. There were two options; culturing yogurt with probiotics or with a yogurt maker. I already had probiotic capsules at home so I went for that option.
At first, it did not come out as creamy as I wanted it to be but, I did not give up and purchased another 3 cans of coconut milk. I was experimenting anyway so I did not mind. But when I made the second batch with Organic Larder’s full-cream coconut milk the result was impeccable. Since then I did not dare to change my combination but you can try and see different brands.
INGREDIENTS(150Kcal):
- 100% organic full-cream coconut milk
- 4 vegetable capsules of 15- 25 billion probiotics

Instructions:
- Open the coconut milk cans and pour the contents into a dish or clean glass jar to start preparing the coconut milk. Stir the coconut milk thoroughly so that the liquid and the creamy top are evenly distributed.
- Flavoring and sweetener should be added: If you want, sweeten the coconut milk with maple syrup or agave nectar. Adding a teaspoon of vanilla extract can also do the trick. Mixing requires a good, long stir.
- Adding the yogurt starter: If using a yogurt starter culture or dairy-free probiotic pills, add them to the coconut milk mixture and stir to combine. Mix everything thoroughly to ensure an even distribution of culture.
- Fermentation procedure: Wrap the jar or bowl in cheesecloth or a clean cloth and secure it with a rubber band or cord if you want to ferment it. Set the temperature between 21 and 27 degrees Celsius (70 and 80 Fahrenheit) to promote fermentation. You can use a yogurt maker, a slow cooker, or just a warm spot in the kitchen.
- Fermentation requires time; typically, it takes between 24 and 48 hours, depending on how sour and thick you want the yogurt to be. Yogurt needs to be tasted and stirred occasionally to ensure it is thickening and getting the right flavor.
- When the yogurt has reached the desired tartness, place it in the refrigerator to cool and set. It will thicken as it cools. After chilling your homemade coconut yogurt, you can enjoy it.
Advice and Alternatives:
- For a thicker yogurt: The yogurt can be made thicker by straining it through cheesecloth or a nut milk bag for a few hours before chilling. If you drain off some of the liquid, the consistency will improve and become creamier.
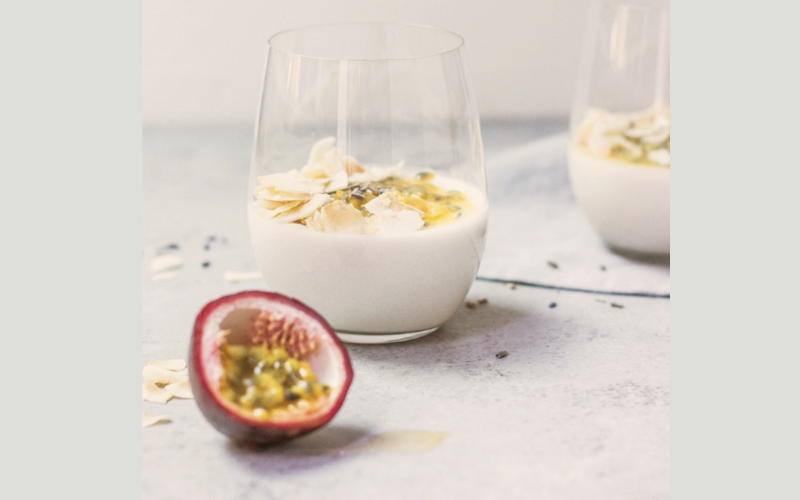
- Add-ons with flavor: Flavorful toppings and syrups let you personalize your coconut yogurt. Add some honey, chia seeds, toasted coconut flakes, or fresh fruit for a sweeter treat.
- Try out many probiotic varieties for varied tastes and health benefits. You can play around with different probiotic strains or yogurt starter cultures. Try to choose strains that are suitable for your needs by checking if they contain dairy or are suitable for vegans.
NOTES:
- If you have a yogurt maker try to buy a small cup of coconut yogurt and mix it with full cream coconut milk and culture it in the machine.
- If you will buy probiotic capsules you can try Now 25-billion capsules, they work very well.
- You can use the last 2 spoons of the yogurt to make a new jar without capsules.
- You might find your yogurt separated in the fridge, just stir it and consume it as normal.
- Do not turn on the oven.